
Get the job done with a pro
From training to full-service marketing, our community of partners can help you make things happen.
Create a Preferences Center
Create a link to the preferences center in your email campaign. When your contact clicks the link, they’ll get a pop-up and an email with a link that takes them to the preferences center to update their profile. Contacts can also opt in or out of groups you’ve created or choose how often they want to hear from you, which can reduce your unsubscribe rates.
In this article, you'll learn how to create and publish a preferences center for your contacts.
Before you start
Here are some things to know before you begin this process.
- Preferences centers aren’t available for audiences with GDPR-enabled signup forms or websites created with the classic website builder.
- Using a custom domain for preferences centers requires a paid plan.
- The preferences center does not include Mailchimp Inbox message permissions.
- Most email templates include an update your preferences link in the email footer. To learn how to add this link elsewhere in the email, check out our Add an Update your Preferences Link article.
- Emails with an *|UPDATE_PROFILE|* merge tag will link to the preferences center instead of your update profile form. We'll send your contacts a separate email with a link to your preferences center.
How it works
A preferences center is a webpage where your contacts can update their profile and preferences based on the groups you’ve created in your audience. When your contact clicks on the update your preferences link in your email, they'll get a pop-up modal with an Email Me A Link button. When your contact clicks the button, we’ll send a separate email with an Update your preferences link. The link will take them to your preferences webpage to complete and submit. Your preferences center webpage will look something like this:

Create a preferences center
To create a preferences center, follow these steps.
- Click Audience, then click All contacts.
- If you have more than one audience, click the Current audience drop-down and choose the one you want to work with.
- Click Subscriber preferences.

If you’ve already created groups in your audience, click Start Building.
If you haven't added any groups to your audience yet, you can add them now by clicking Add Groups To Forms. To continue without adding groups, click Build Your Preferences Center.

Great work! This will take you to the preferences center builder, where you can customize the content, design, and URL.
Customize and publish your preferences center
Now, you’ll customize and publish the preferences center using the Customize, Domain, Access, and Publish pages.
On the Customize page, you can replace your header text with an image, style the first paragraph, choose a color set and font style, and upload an image.

- Click the header text and click Replace to swap the text with an image from the content studio or from stock photos.

- Click anywhere in the first paragraph to edit or delete the sample text, and use the toolbar to style it.

Click the color, text, or image icons to choose a color set, select a text and button font style, and to upload an image from your device.

Click Edit Fields to expand the panel. Toggle the slider to include optional audience fields. Visible fields on your signup form will be grayed out and can't be turned off.

When you’re done editing, click Save and Continue.
On the Domain page, choose a URL for your preferences center. You can use a custom domain with a paid plan, or use a mailchimpsites.com domain. Click Save and Continue.

On the Access page, click Continue.
On the Publish page, click Publish. If you need to make changes after publishing, go to the preferences center page in your audience and click Edit.
After you publish, contacts who click an *|UPDATE_PROFILE|* merge tag link in your emails will get a separate email with a link to update their profile and interests on your preferences webpage.
Unpublish or delete a preferences center
If you unpublish or delete a preferences center, Mailchimp will send users the update profile form when they click the *|UPDATE_PROFILE|* merge tag.
In this section, you'll learn how to unpublish and delete a preferences center.
Unpublish a preferences center
If you want to remove your preferences center but keep it for later, you can unpublish it.
To unpublish a preference center, follow these steps.
- Click Audience, then click All contacts.
- If you have more than one audience, click the Current audience drop-down and choose the one you want to work with.
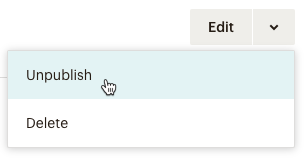
- Click the Edit drop-down and choose Unpublish.
- In the Unpublish Preferences Center pop-up, click Unpublish.

Delete a preferences center
You can delete your preferences center if you’re sure you don’t want to use it again. The contents of your preferences center will also be erased.
To delete a preferences center, follow these steps.
- Click Audience, then click All contacts.
- If you have more than one audience, click the Current audience drop-down and choose the one you want to work with.
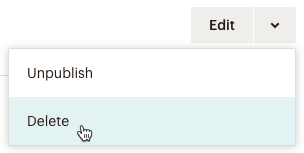
- Click the Edit drop-down and choose Delete.
- In the Delete Preferences Center pop-up, type DELETE in all caps and click Delete.

Next steps
Check out these additional resources to help you maintain an active, up-to-date audience.
Requirements and Best Practices for Audiences
The Importance of Permission
Technical Support

Have a question?
Paid users can log in to access email and chat support.