Track Outside Activity with Events
At a glance
Events are activities that a contact engages in outside your emails that you want to track or monitor. Events are useful within Mailchimp for market analysis and segmentation, or you can use an event to start an automation.
Events help you do things like:
Track which contacts have registered for your conference
Put contacts who’ve viewed mugs in your e-commerce store into a “mug enthusiast” segment
Trigger an automation to send an email when a newly registered user enters a referral code
You can find more robust event-tracking tools outside of Mailchimp, but if you need something lightweight that integrates well with your Mailchimp audiences, the Events endpoint may be a good choice.
For the purposes of this guide, we’re a game developer and our app has paid premium content. Users can encourage their friends to sign up with referral codes; in exchange, we send those referrers discount codes for our merch.
In this guide, we’re going to create an event for whenever a new user signs up with a referral code. We’ll use this event to trigger an automation—sending an email to the referring contact with the discount code for our e-commerce store—and to create a segment of referring contacts for future campaigns.
What you’ll need
An audience in your Mailchimp account
The Audience ID for that audience
Create an event
We want to create an event for a contact when their referral code is successfully used. You can define an event for any action a contact might take. Event names are fully customizable, so you can assign them meaningful names. You can also create and assign properties to add further context to the event.
You can name an event however you like, but to match the way other activities in a contact’s profile are listed, use a verb-noun pair, with an underscore (_) as the delimiter. For our example, the event will be named registered_referral.
So: someone just signed up for an account using a referral code. We’ll use that code to look up the referring user in our app, then create an event for that contact within Mailchimp:
Create an event
dc="YOUR_DC"
apikey="YOUR_API_KEY"
listid="YOUR_LIST_ID"

referral_code="THE_REFERRAL_CODE"
subscriber_email="$(LOOKUP_IN_YOUR_APP)"
subscriber_hash="$(echo -n "$subscriber_email" | md5sum | cut -d' ' -f1)"

read -r -d '' data <<EOT
{
  "name": "registered_referral",
  "properties": [
    "${referral_code}"
  ]
}
EOT

curl -s --request POST \
--url "https://${dc}.api.mailchimp.com/3.0/lists/${listid}/members/${subscriber_hash}/events" \
--user "foo:${apikey}" --include \
--data "$data" && echo "Event successfully created!"Note: The options payload includes an optional occured_at property (see more in the API reference). You can set this to the date and time the event occurred in ISO 8601 format; if omitted, it will default to the current time.
The optional is_syncing property allows you to specify whether or not an event should trigger an automation (if one is configured for this event). Setting is_syncing to true will not trigger automations. You might use is_syncing alongside occured_at to backfill events that you don’t want to act on. Since we want to trigger an automation and the default is_syncing value is false, we’ll omit it entirely.
View a contact’s events
Since this is the first time we’ve created this event, we should take a look to make sure it was recorded as expected. Events are reflected in a contact’s profile alongside other information about their engagement behavior.
You can view a contact’s events—alongside other behavioral information—in the Mailchimp web application, but here, we’ll make a call to the API:
View a contact’s events
dc="YOUR_DC"
apikey="YOUR_API_KEY"
listid="YOUR_LIST_ID"

referral_code="THE_REFERRAL_CODE"
subscriber_email="$(LOOKUP_IN_YOUR_APP)"
subscriber_hash="$(echo -n "$subscriber_email" | md5sum | cut -d' ' -f1)"

num_events="$(curl -s \
--url "https://${dc}.api.mailchimp.com/3.0/lists/${listid}/members/${subscriber_hash}/events" \
--header 'content-type: application/json' \
--user "foo:${apikey}" | jq -r '.total_items')"

echo "We have created ${num_events} for this user."
By default, the API will return the most recent 10 events. You can specify event count, offset, and other options if needed.
Trigger automations with events
Beyond simply logging contact behavior, events can trigger further action—in particular, automations and segmentation. At our games company, we want to send our referring contact an email thanking them for the referral with a discount merch code, so we’ll set up an automation to do so.
Mailchimp accounts on an Essential plan or higher can use an event to trigger a Customer Journey, but you’ll need a Premium or Pro account to send a series of automated emails. We just need a one-off here: successfully refer a friend and we send you the discount code.
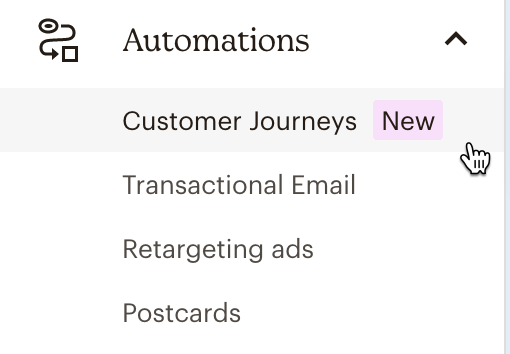
You manage event automations through the Mailchimp web app. Click Automations and choose Customer Journeys.

If you’ve previously used the classic automations builder and want to use that to create this automation, click Check out Classic Automations to start that up. Any Mailchimp account that has previously created a Classic Automation can use an event to trigger a single automation, but you need a Pro plan or higher to send a series of automated emails. For details, check out About Classic Automations.
Hit Create Journey.
We’ll name our customer journey Referral discount and choose the audience we want to work with and hit Start Building. Then, we’ll define our trigger event.
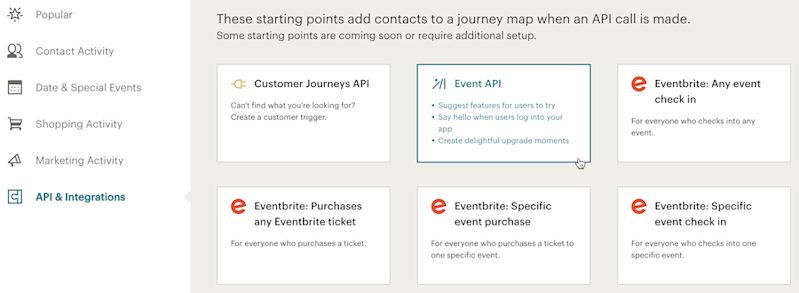
Hit Choose A Starting Point, and then choose Event API from the API & Integrations menu.

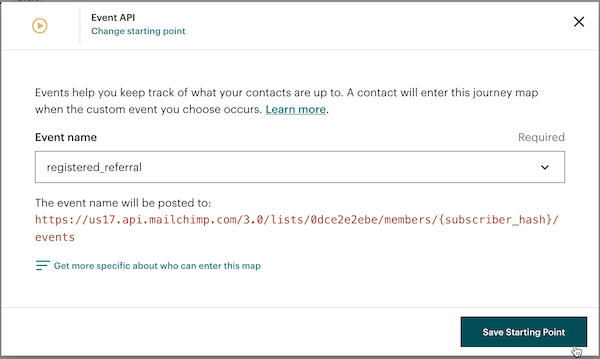
Enter the name of the event. For this, we want to use our event registered_referral.
You can also set custom filters for contacts to further customize the automation trigger. When you’re done, click Save Starting Point.

On the Customer Journey Builder page, we’ll set the action for the trigger by clicking the Send email block and then clicking the plus icon (+) on the map. Once the block is added to the journey, click the Gets email block to customize the email you’ll send. You can set the schedule for when the email will be sent, design a template for the email and more. For details, check out Use Send Email Actions.
Once you’ve set up your email, hit Continue, and then Turn on to activate the automation.
Create segments with events
Now we want to use our event to set up segments in our Mailchimp audience. We’re interested in the users who’ve referred their friends—they seem like they’ll be a reliable group to target going forward—so we’re going to set up a segment called “Referrers” for future campaigns.
Once again, we have to set this up via the web app. Navigate to the Audience dashboard and choose the correct audience. Select View Contacts, and once you’re on the contacts page, select New Segment:

Note that if you’re on a Mailchimp Premium or Pro plan, you’ll see a slightly different flow that allows you to choose between an Advanced Segment or a Regular Segment. For this example, we’re using a Regular Segment.
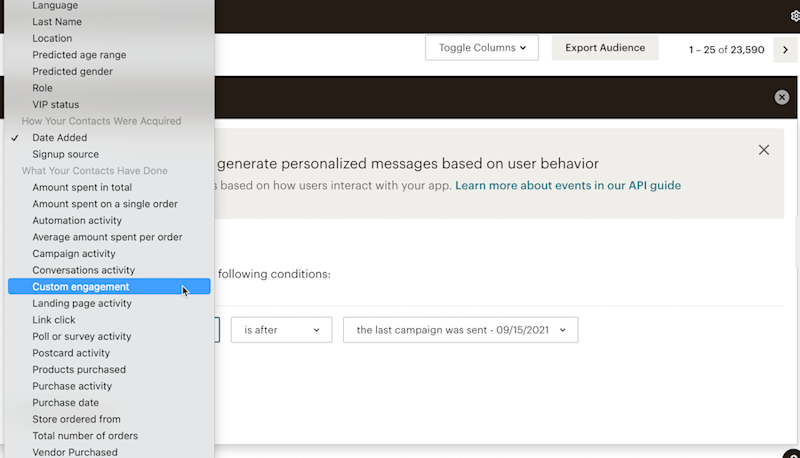
Under What your contacts have done, select Custom Engagement and you’ll see your Event in the second drop-down. You can set date boundaries, but we’ll keep it simple: this segment is for anyone who’s triggered the registered_referral Event.

Preview the segment, hit save, and you’re good to go.
Note: Essential and higher Mailchimp plans can set up Event-based segments, but if you want more granularity, you'll need a Premium or Pro plan, which let you create segments with unlimited segment conditions—as well as the ability to segment by Event properties themselves.