Getting Started with Campaigns
Need help getting started with Mailchimp campaigns? This article walks you through the basics.

Get the job done with a pro
From training to full-service marketing, our community of partners can help you make things happen.
Use folders to organize your regular emails, ads, automations, and other projects in Mailchimp. Whether you've already completed a campaign or are still working on a draft, you can move it in and out of the folders you've created.
In this article, you'll learn how to create, manage, and delete folders.
Create folders from the Campaigns page or the Report page.
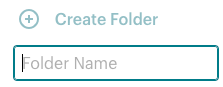
To create a folder, follow these steps.
To rename your folder, use the Folder drop-down, then click the edit icon next to the folder you want to work with.
To create a folder, follow these steps.
To rename your folder, click the edit icon next to the folder you want to work with. Enter a new name, then press Enter.
Move your campaigns from one folder to another, or organize your unfiled campaigns from the Campaigns or Reports page.
When you move an item into a folder, it'll still appear in the full list on your Campaigns or Reports page. You can move items to a single folder at any time, but items can't be saved in multiple folders at once. If you delete a campaign, it'll be removed from both the folder and your account, along with any associated data.
To move campaigns into the folders you created, follow these steps.
Click Campaigns, then click All campaigns.
Check the box next to each campaign you want to move.
Click Move to folder.
Choose a folder from the Select a folder drop-down.
Click Move.
To move campaigns into folders, follow these steps.
Click Analytics, then click Reports.
Check the box next to each campaign you want to move.
Click the Move To drop-down, then select a folder.
Find your unfiled campaigns on the Campaigns page and decide if you want to move any of them into folders. This option isn’t available on the Reports page.
To find your unfiled campaigns, follow these steps.
Click Campaigns, then click All campaigns.
Click the Folder drop-down, then select Unfiled items.

To delete a folder, follow these steps on the Campaigns page or Reports page. Deleting a folder won’t delete any campaigns from your account.
To delete a folder from the Campaigns page, follow these steps.
Click Campaigns, then click All campaigns.
Click the Folder drop-down, then click the trash icon next to the folder you want to delete.
![]()
The folder's campaigns will still be stored in your account. If you want to remove them, learn how to delete your campaigns.
To delete a folder from the Reports page, follow these steps.
Technical Support

Have a question?
Paid users can log in to access email and chat support.
Need help getting started with Mailchimp campaigns? This article walks you through the basics.