View and Edit Section Design in Email and Landing Pages
Design entire sections of your emails and landing pages, including the header, footer, and body. Learn how to add borders, background colors, and more.

Get the job done with a pro
From training to full-service marketing, our community of partners can help you make things happen.
When you build your Mailchimp website, use the Sections panel to quickly mix and match different types of content on each page. Choose a section layout, then add your images, text, signup form, or other custom details to make your website your own.
In this article, you'll learn about the different types of sections you can use to design your website.
Here are some things to know before you begin this process.
Here are the different section types you can add to your web page.
| Section Type | Description |
|---|---|
| Header | The top area of your web page. This can display your logo, your navigation bar, and a button. Each page has only one Header, which can't be moved or removed. |
| Intro | A place to introduce your business or brand. This can include a text area, an image, and a button. |
| Text | A section just for text. This can include 1-column text or 2-column text. |
| Text & Image | A section for including images and text side by side. This can include a text area, an image, and a button. |
| Subscribe | A section that includes a signup form so visitors can subscribe to your email marketing. When someone signs up, they’ll be added to the audience associated with your website. This can include multiple input fields, an image, a text area, and a subscribe button. |
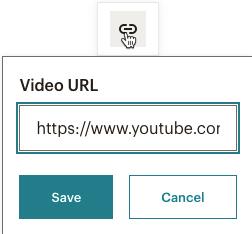
| Video | A section to embed a video on your site. You can add a URL from YouTube or Vimeo. |
| About | A section to share details about your business, brand, or message. This can include multiple images and text areas. |
| Quote | A section to share a customer quote or testimonial about your product or service. Let people know what sets your brand apart. |
| Contact | A section to inform your visitors on how to get in touch with you. This can include text areas and a call-to-action button. |
| Footer | The bottom area of your web page. This can display your logo, your sitemap, social links, a text area, and a button. If you're on a free plan, it will also display the Mailchimp badge. Each page has only one Footer section, which can't be moved or removed. |
To view the sections in your page, follow these steps.
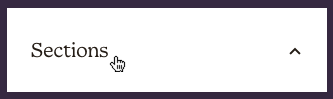
In the site builder, click the Sections panel.

The panel will expand to show you the sections in your web page.
Hover over any section in the panel to view that area of the page.
From here, you can click a section name to access its style options, or click and hold the item handle to move a section.
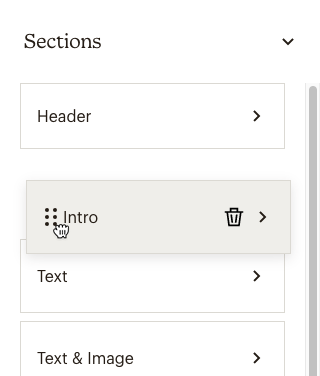
Each section has a background and layout styling options to help you design a unique page for your website. Some sections also have optional components you can customize, like a logo or social links. To change these settings, click the name of a section in the Sections panel, or hover over the section you want to work with and click Edit Section.
Here are the different styles and components you can edit.
There are multiple ways to add a section to your webpage.
To add a section from your Sections panel, follow these steps.
On your web page, click the Sections panel.
The panel will expand to show you the sections in your web page.
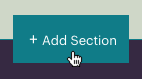
Hover your cursor below the name of the section where you'd like to add a new section, then click Add Section.


To add a section from your page layout, follow these steps.
In your page layout, hover your cursor over the plus (+) icon where you’d like the new section to go.

Click Add Section.
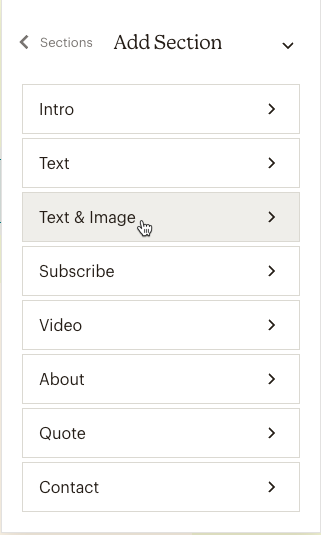
On the Add Section step of the Sections panel, choose the section type you'd like to add.
Choose a layout for your new section.
To remove a section, follow these steps.
Hover your cursor over the section you'd like to remove.
Click the Trash icon.
![]()
In the pop-up, click Remove Section.

Nice job. If you accidentally remove a section you want to keep while editing your website, click the Undo button.
Your website is up and running. Now what? Here are a few ways to optimize your Mailchimp website.
Customize your website favicon
Change your site icon to a custom image that matches your brand style and brings a polished look to your website. To learn how to customize your website favicon, check out Customize the Favicon of Your Mailchimp Website or Landing Page.
View reports
We’ll start to compile reporting data as people visit your site. You can see who visits your website, clicks links on your web pages, and subscribes to your emails.
Promote your website
Promote and share your new website through marketing campaigns in Mailchimp. Run an ad for your website. Link to your website from a regular email campaign. You can also share your website URL on social media.
Add a pop-up signup form
A pop-up signup form helps you connect with your website visitors. Design and customize it to fit your brand, and add special offers or discounts to help grow your audience and boost sales. To learn more, check out Add a Pop-Up Signup Form to Your Website.
Technical Support

Have a question?
Paid users can log in to access email and chat support.
Design entire sections of your emails and landing pages, including the header, footer, and body. Learn how to add borders, background colors, and more.
Learn about Mailchimp's website feature.