Get the job done with a pro
From training to full-service marketing, our community of partners can help you make things happen.
Use Email Content Generator in the New Builder
Mailchimp’s Email Content Generator creates compelling text based on prompts for your marketing goals and tone. We use AI-powered technology to generate email content for paragraphs, subject lines, headings, and subheadings. Choose generated text to add to your email, and edit it to make your own.
In this article, you'll learn how to use the Email Content Generator in the new builder.
Before you start
Here are some things to know before you begin this process.
Email Content Generator is a beta feature that’s initially being released to a small percentage of Mailchimp users.
This feature is available for users with a Standard plan or higher. For more information on what features are included with each plan, check out our pricing page.
We recommend that you review the additional terms for text generation before sending an email with generated content.
The Email Content Generator is available for regular emails and automation flow emails. The Email Content Generator is also available in single abandoned cart emails and automated welcome emails.
Definitions
Prompt
A combination of user generated key points and predefined values that you can add to the Email Content Generator. The more specific your key points are, the stronger your results will be.Marketing goal
The objective you want your message to achieve.Key points
A summary you create that uses keywords and phrases to personalize your generated content. The more specific your summary is, the stronger your results will be.Tone
The personality and feeling you want to deliver through the message to your audience.Content type
A piece of writing that is generated for your email content. Choose between paragraph, heading, subheading, and, or subject line.Generated content
The output results that the Email Content Generator creates.
How it works
The Email Content Generator uses OpenAI and GPT technology to create on-brand content for you to share with your audience. Once you’ve accepted our additional terms for text generation, you’ll see the Prompt settings. Choose your content type, marketing goal, key points, and up to 3 tones.
We’ll generate 3 options at a time that you can choose from based on the content type you’ve selected.
Access the Email Content Generator
To use the Email Content Generator, follow these steps.
Navigate to the Content section in your email, classic automation, or an email in an automation flow.
If you haven't selected the new builder as your preferred email experience, select that option in the pop-up.
If you’re creating a new email, classic automation, or automation flow, choose a starting point template, then click Apply.
Click the Generate icon.
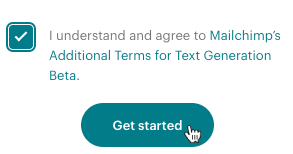
Check the box next to Mailchimp’s Additional Terms for Email Content Generator Beta, then click Get started.

Great! You’ll see the Prompt settings where you can input the information that will make up your generated content.
Use the Email Content Generator
To add your prompts for generating meaningful content, follow these steps.
Click the What do you want to generate? drop-down and choose a content type. You can choose a paragraph, heading, subheading, or subject line.
Click the Marketing goal drop-down and choose a marketing goal for your email.
In the Key points to include box, add the terms for your key points. The more key points you add, the stronger your generated content results will be.
In the Select up to 3 tones drop-down, choose the words to describe the tone you want for your email. You can delete selections by clicking on the X at the top of the drop-down menu.
Click Generate.
To see more generated content, click Rewrite. Use the left and right arrows to scroll between generated content options.
Add generated content to email
To add the generated content to your email, follow these steps.
For Paragraph, Heading, and Subheading content, drag the generated content to the place where you want it in the email. Or, you can use the Plus icon (+) to insert the content at the top of your email. Click the double boxes to copy the content to your clipboard and paste it where you want it to appear.
For Subject line content, click on the checkmark to use the generated content. In the Change subject line pop-up, you’ll have the option to keep the generated content or edit it. Click Add to campaign.
Technical Support

Have a question?
Paid users can log in to access email and chat support.