About the Canada Anti-Spam Law (CASL)
Learn about the Canadian Anti-Spam Law and what it requires.

Get the job done with a pro
From training to full-service marketing, our community of partners can help you make things happen.
Mailchimp's signup forms, audiences, and emails can help you manage Canada Anti-Spam Law (CASL) requirements. If you're in Canada or send a Commercial Electronic Message (CEM) to Canadian residents, you’ll need to comply with CASL.
This article is provided as a resource, but it’s not legal advice. If you have more questions, we encourage you to contact a lawyer in your area who is familiar with this issue. And check out our article About the Canada Anti-Spam Law (CASL) for more information.
CASL requires that you include a few pieces of information that are clearly and prominently displayed in each email you send. This information is typically shown in the footer.
There are additional requirements when sending an email on behalf of another person.
Luckily, Mailchimp's email templates include a Footer that pulls all the required content into the email with merge tags.
First, you’ll add or update your sender info. Then, if you use the legacy builder, use the email builder to verify or update your unsubscribe options.
To update your sender info in the email footer, follow these steps.
Most footer templates already contain the unsubscribe merge tag, *|UNSUB|*. If you're using the legacy builder, take a quick look in the builder to verify the tag is there. If it isn't, follow these steps.

If you send a lot of emails, or have several users on your account, you may want to add the required information to an email and reuse it, or create a template. To make sure your merge tags display the right information, check out About Email Footers.
If lots of people in your audience have only given you implied consent to receive your messages, you'll need to ask those contacts to explicitly opt-in to receive your Mailchimp emails. Under CASL, a request for express consent is a Commercial Electronic Message (CEM), so make sure that you have authority to send the opt-in request.
There are a few steps to sending a consent email.
To create a consent group, follow these steps.
Great job! Now you can import contacts to these groups or click Done for now.
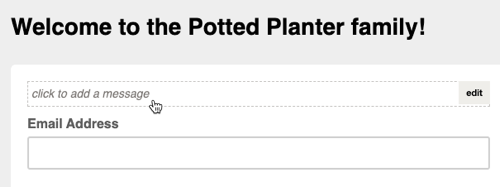
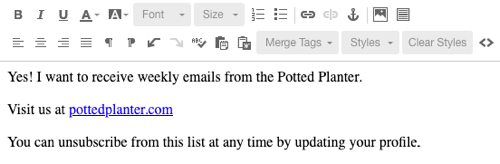
Your name, contact information, and a description of the messages that will be sent must appear on both your Signup form and Update profile form. You must also include a statement that the recipient can withdraw their consent at any time. If you’ve published a preferences center to replace the Update profile form, you'll need to update that too.
To add required content to forms, follow these steps.

You may also want to edit your Update profile email and Update profile "thank you" page to reflect CASL's changes.
After you've created the consent group and updated your forms, it's time to create an email whose primary focus is a link to the Update profile form.
Build an email as you normally would, and use the merge tag *|UPDATE_PROFILE|* as the link for text, an image, or a button somewhere in your email. We'll replace the merge tags with a URL of the subscriber's update profile page anywhere the merge tag appears. To add the merge tag, edit a content block and enter the merge tag into the Web Address (URL) field for the text, image, or button you want to link.

Preview and test your email as you normally would, and send it to your entire audience. We'll automatically filter out anyone who isn't a subscribed contact.
To get the greatest response from your subscribers, you may need to send your Update Profile email a few times. You might want to create an A/B Test to test the most effective day or hour, to help you make the most of each send.
Each time you send the Update Profile email, be sure to segment your audience. Remove anyone in the new consent group as well as new subscribers who signed up after the date you updated your signup form, so you don't ask them to consent twice.
Note
To send through Mailchimp, all audiences must be clean and current, so we suggest only sending to contacts who have opted-in to receive email communications in the past 12 months. Sending to older contacts often generates many bounces, unsubscribes, or abuse complaints, which can result in account suspension and even possible complaints to regulators. You can use a third-party service if you need to clean your audience before using Mailchimp.
To comply with Mailchimp's Standard Terms of Use, you can only send emails to subscribers who have given appropriate consent under applicable laws. To do this, bulk unsubscribe all subscribers who aren't in the consent group and who signed up before you updated your signup form. To remain in compliance and keep a healthy audience moving forward, you should remove out-of-date subscribers no later than one year after you start the signup or cleaning process.
To get proof of consent data, just export your audience. If you only want to see who's in the consent group, view or export segments of your audience. You may also want to keep a copy of your signup form, in case you need to prove that the form included all of CASL's required information.
When you export your audience, look for these columns on your CSV file.
Mailchimp tracks this information through your signup form, so we can't use it for subscribers you import. To be safe, you should also have proof of consent for imported subscribers in a separate document or in hidden text fields in your Mailchimp audience.
Technical Support

Have a question?
Paid users can log in to access email and chat support.
Learn about the Canadian Anti-Spam Law and what it requires.
Learn about anti-spam requirements for Mailchimp's email platform and make sure your campaigns are compliant.