
Get the job done with a pro
From training to full-service marketing, our community of partners can help you make things happen.
Create and Send a Marketing SMS
Use Mailchimp’s SMS Marketing to connect with your audience in a direct and personalized way. In addition to marketing emails, create and send marketing text messages to reach your subscribed contacts through an additional channel.
In this article, you’ll learn how to create and send a marketing SMS with Mailchimp.
Before you start
Here are some things to know before you begin this process.
- This article covers how to create and send an SMS. To learn more about how SMS Marketing works, check out About SMS Marketing with Mailchimp.
- SMS Marketing is available as an add-on for customers with the Essentials plan or higher.
- At this time, You can only send text messages to subscribed SMS contacts with numbers from a registered country within an SMS program. For example, if you have registered SMS Marketing programs for the UK and US, you can send text messages to subscribed UK SMS and US contacts.
- Before you can send a marketing text message, you need to submit an application and be approved.
- If you have SMS marketing programs for multiple countries registered on the same audience you can send to subscribers across all countries at once or segment by SMS Phone Country to target specific subscribers in countries.
- For US programs, the average carrier processing time for an SMS Marketing applications is typically 1-2 business days. During this time, you can’t create or send marketing text messages. For other programs, there's no processing time for an SMS Marketing application.
- You must be an account Owner, Admin, or Manager to send an SMS. Learn more about the different user levels in Mailchimp.
- MMS (Multimedia Messaging Service) and branded SMS short links are included with the Standard plan or higher. MMS is available for US and Canadian programs.
- Prior to sending an SMS, make sure any required brand contact information is always accessible to your subscribers.
Definitions
Here are some terms you’ll come across as you create and send a marketing SMS.
SMS builder
The space where you create, edit, and preview your SMS or MMS (US and Canada only). This space includes functionality like adding emojis, merge tags, or media to your text message. You can also track your character and message counts, send a preview SMS, automatically shorten links in your text message, add opt-out instructions, or browse SMS templates.
SMS checklist
A page within the SMS builder where you can view all parts of your SMS and trigger a send. This page includes a Message name, Recipients, and Content section. After you add content to your text message, return to this page to view the number of SMS credits required to complete your send.
Opt-out instructions The Opt-out option modal provides the ability for a contact to unsubscribe from all messaging senders registered to a business in Mailchimp by replying with a “STOP” text, or clicking to unsubscribe from a branded sender. In Canada, UK, and US the Opt-out instructions can be removed from SMS program messages.
Universal Opt-out
Opt-out instructions are required for all regions including:
- Americas
- Europe
- APAC
Tips for SMS marketing
SMS marketing is a great channel to have for sending targeted text messages that can offer value to its recipients. If you’re selling a product or service, you may consider pairing a discount code or exclusive promotion with a link to your website.
If your SMS program meets the requirements, you may consider an SMS short code. Short codes are 5—6 digit phone numbers that you can use to send and receive text messages. They are designed for commercial and non-profit organizations to help them communicate with customers, members, and supporters.
We recommend that you enable the Automatically shorten and track links checkbox in the SMS builder to use shortened links in your text messages. Shortened links help save on characters used in your message. They also help track how many people clicked on the link. This information can be found in the SMS report.
It’s also a good idea to keep your text messages brief and relevant to your subscribed contacts.
Create an SMS
After your SMS application is approved and you have acquired opt-ins, you’re ready to create an SMS.
You can only send text messages to contacts from your sending country who opt in to receive SMS marketing from you. To learn how to acquire proper consent for your SMS marketing, check out Create and Promote an SMS Marketing Signup Form.
From scratch
To create an SMS from scratch, follow these steps.
- Click SMS.
- Click Create SMS.
- In the Message Name section, click Edit. Enter the name of your SMS, then click Save.
In the Recipients section, click Edit. By default, All SMS Subscribers is selected in the Send to drop-down. Here are some optional ways to include or exclude specific, subscribed SMS contacts from your text message.
- To send your text message to an existing segment, advanced segment, or tag in your connected audience, click the Send to drop-down, then choose the segment, advanced segment, or tag you want to send to. Advanced segmentation is available with the Standard plan or higher.
- To send your text message to a new segment, click the Send to drop-down, then click New segment. Use the segment builder to create your segment, then click Use segment when you’re ready.
- To send your text message to a new advanced segment, click the Send to drop-down, then click New advanced segment. Use the segment builder to create your advanced segment, then click Use segment. Advanced segmentation is included with the Standard plan or higher.
- To exclude an existing segment or tag in your SMS-enabled audience from your text message, click the Do not send to (optional) drop-down, then choose the segment or tag you want to exclude.
- To paste a list of subscribed SMS phone numbers to include or exclude from your text message, click the Send to drop-down, then click Pasted phone numbers. Paste the subscribed SMS phone numbers into the SMS phone numbers text box, click Include these phone numbers in my segment or Exclude these phone numbers in my segment, click Save segment, then click Save. You must have SMS consent from any pasted phone numbers you want to send to.
- In the Content section, click Edit to access the SMS builder.
- Enter your SMS copy in the Message text box. A preview of your message will automatically appear on the screen. The character count for your SMS appears in the Message text box. If your copy exceeds the character limit, your SMS will send as multiple text messages that require individual credits. The number of messages required to complete your send is also shown in the Message text box. To learn more about SMS credits, check out About SMS Marketing Credits.
- To add an emoji to your SMS, click the Add emoji icon, then select the one you want to use. Emojis count towards character limits.
- To personalize your SMS, click the Add merge tag(s) icon, then select the merge tag you want to add. If you want to set default values for merge tags values or create a new merge tag, click the Add merge tag(s) icon, then select Manage merge tags.
SMS merge tags work the same as email merge tags. To add media to your SMS, click the Add media icon, select the file you want to add from the content studio or upload a new one, then click Insert. Depending on your pricing plan, you may not have access to this feature. MMS is available for US and Canadian programs.
Here are some things to keep in mind if you want to add media to your SMS.
- When you add media to your SMS, it automatically becomes an MMS.
- You can add 1 image to an MMS.
- Your file needs to be a JPEG, PNG, or GIF.
- For the best display, we recommended images that are 600KB or less with an aspect ratio of 2:3.
- MMS follow different carrier rate limits, and they have specific character limits.
- An MMS requires more credits to send than an SMS. In the US, an MMS costs 3 credits. In Canada, an MMS costs 5 credits to send.
To add a discount code from your online store, click the Add discount code icon. If you have more than one store, use the drop-down to choose the store that has your discount code.
We support discount codes from these e-commerce platforms:
If you want to remove your sender name from the beginning of your text message, click Settings, then check the Prefill company name box. Your company name is the brand name that you listed on your SMS Marketing application. Some carriers require that you include your company name in your text messages, so this is included for you by default. The company name is required for Australian, French, Spanish, Swiss, Dutch, German, Irish, and Austrian programs. Your company name counts towards your character limit.
If you want to add opt out instructions to your text message, click Settings, then check the Include opt-out instructions box. Choose the language you want to translate the opt-out instructions to.
If you want to shorten and track links in your text message, click Settings, then check the Automatically shorten and track links box.
If you want to use a branded SMS short link in your text message, click Link settings, then toggle the Enable branded short links slider to on. Enter the subdomain you want to use in the Subdomain text box, then click Save. Subdomains must be 25 characters or less, and they can only include letters, numbers, or dashes. Branded SMS short links are included with the Standard plan or higher.
Click Save and continue.
From a template
If you want to use pre-built content to create your text message, use an SMS template. Each SMS template is designed to accomplish a specific SMS marketing goal. SMS templates are also customizable so you can include your own company name, link, or discount.
Here are the SMS template options.
| SMS Template Name | Purpose | Industry | Message Type |
|---|---|---|---|
| Welcome New Customers | Welcome | E-commerce/Retail | Automation |
| Welcome with Discount | Welcome | E-commerce/Retail | Automation |
| Labor Day Sale | Seasonal | All | Bulk |
| End of Summer Sale | Seasonal | All | Bulk |
| Back to School Sale | Seasonal | All | Bulk |
| Halloween | Seasonal | All | Bulk |
| Abandon Cart Reminder | Sell products | E-commerce/Retail | Automation |
| Feature Product | Announce | E-commerce/Retail | Bulk |
| Request a Donation | Donation Request | Education/Nonprofit | Bulk |
| Remind for Upcoming Class | Sale Services | Health/Wellness | Automation |
| Announce a New Show | Announce | Arts/Entertainment | Bulk |
| Start of Sale | Sell Products | E-commerce/Retail | Bulk |
| End of Summer Sale | Sell Products | E-commerce/Retail | Bulk |
| Welcome new subscribers | Welcome | Education/Nonprofit | Automation |
| Product Updates: New Products | Sell Products | E-commerce/Retail | Bulk |
| Promotion: Exclusive Offer | Sell Products | E-commerce/Retail | Bulk |
| Promotion: Limited Time Offer | Sell Products | E-Commerce/Retail | Bulk |
| Promotion: Mega Sale | Sell Products | E-commerce/Retail | Bulk |
| Schedule Next Appointment | Sell Services | Health/Wellness | Automation |
| Promotion: Sale | Sell Products | E-commerce/Retail | Bulk |
| Welcome: Welcome Discount | Welcome | E-commerce/Retail | Automation |
| Welcome: Welcome Message | Welcome | E-commerce/Retail | Automation |
| Win-back: We Miss You | Sell Products | E-commerce/Retail | Automation |
| New Product Announcement | Announce | E-commerce/Retail | Bulk |
| Clearence Sale Reminder | Sell Products | E-commerce/Retail | Bulk |
| VIP Sale | Sell Products | E-commerce/Retail | Bulk |
| Abandon Cart with Discount | Sell Products | E-commerce/Retail | Automation |
| Birthday Offer | Special Dates | E-commerce/Retail | Automation/Bulk |
| Invitation to Volunteer | Invite to Event | Education/Nonprofit | Bulk |
| Thank You for Volunteering | Thank You | Education/Nonprofit | Bulk |
| Thank You for Donating | Thank You | Education/Nonprofit | Bulk |
| Update on Impact | Announce | Education/Nonprofit | Bulk |
| Welcome New Subscribers | Welcome | Health/Wellness | Bulk |
| New Service Announcement | Announce | Health/Wellness | Bulk |
| Renew Membership | Sell Services | Health/Wellness | Bulk |
| Announce a Pre-Sale | Announce | Arts/Entertainment | Bulk |
| Announce Tickets on Sale | Announce | Arts/Entertainment | Bulk |
| Reminder for Upcoming Show | Sell Services | Arts/Entertainment | Bulk |
| Reminder to Buy Tickets | Sell Services | Arts/Entertainment | Bulk |
| Holiday: Holiday Sale | Seasonal | All | Bulk |
| Holiday: Holiday Wishes | Seasonal | All | Bulk |
To create an SMS from a template, follow these steps.
- Click SMS.
- Click Create SMS.
- In the Message Name section, click Edit. Enter the name of your SMS, then click Save.
In the Recipients section, click Edit. By default, All SMS Subscribers is selected in the Send to drop-down. Here are some optional ways to include or exclude specific SMS contacts from your text message.
- To send your text message to an existing segment, advanced segment, or tag in your connected audience, click the Send to drop-down, then choose the segment, advanced segment, or tag you want to send to. Advanced segmentation is available with the Standard plan or higher.
- To send your text message to a new segment, click the Send to drop-down, then click New segment. Use the segment builder to create your segment, then click Use segment when you’re ready.
- To send your text message to a new advanced segment, click the Send to drop-down, then click New advanced segment. Use the segment builder to create your advanced segment, then click Use segment. Advanced segmentation is included with the Standard plan or higher.
- To exclude an existing segment or tag in your SMS-enabled audience from your text message, click the Do not send to (optional) drop-down, then choose the segment or tag you want to exclude.
- To paste a list of subscribed SMS phone numbers to include or exclude from your text message, click the Send to drop-down, then click Pasted phone numbers. Paste the subscribed SMS phone numbers into the SMS phone numbers text box, click Include these phone numbers in my segment or Exclude these phone numbers in my segment, click Save segment, then click Save. You must have SMS consent from any pasted phone numbers you want to send to.
- In the Content section, click Edit to access the SMS builder.
- Click Browse templates.
- In the Select a template pop-up modal, hover over the template you want to work with, then click Insert.
- Fill in the placeholder content with your own information, add any additional content as needed, then click Save and continue. If you don’t update the placeholder text, you’ll get an error message to remind you.
Settings
In addition to editing the text of your SMS, use the Settings section to make further changes to your message.
If you want to remove your company name from the beginning of a text message and put it elsewhere in your message, click the Prefill company name checkbox. Your company name is the brand name that you listed on your SMS Marketing application.
Note
Some carriers require that you include your company name in your text messages, so this is included for you by default. Your company name counts towards your character limit.
Some carriers require that you include your company name in your text messages, so this is included for you by default. Your company name counts towards your character limit. If you want to shorten and track links in your text message, click the Automatically shorten and track links checkbox. If you want to add opt out instructions to your text message, click the Include opt out instructions checkbox. Branded SMS short links help avoid filtering in markets like Sweden.
If it’s been 30 days or more since you last contacted a recipient, opt out instructions should be included in your message. Opt-out instructions count towards your character limit. If you want to use a branded SMS short link in your text message, click Link settings, then toggle the Enable branded short links slider to on. Enter the subdomain you want to use in the Subdomain text box, then click Save. Subdomains must be 25 characters or less, and they can only include letters, numbers, or dashes. Branded SMS short links are included with the standard plan or higher.
Note
- The format of the opt-out instructions can differ based on your SMS programs sending country. Some countries use instructions that detail how to unsubscribe while others include a link in the message that directs recipients to an unsubscribe page.
Use write with AI
Write with AI is a beta generative AI (GenAI) feature that’s released to a small percentage of Mailchimp users. It offers prompt suggestions that can help you create or improve your SMS content.
Check out Use Write with AI to Create Content to learn more.
Send a preview SMS
If you want to test your SMS content before you send a live text message to your subscribed SMS contacts, send a preview SMS. You can send 15 preview text messages per day. SMS credits aren’t required to send a preview SMS.
To send a preview SMS, follow these steps.
- In the Content section of the SMS checklist, click Edit.
- Click Send a preview.
- In the Send a preview pop-up modal, enter the phone number you want to send a preview SMS to.
- When you’re ready to send a preview SMS, click Send.
Review or refill your SMS credits
After you create your SMS and test it with a preview, review or refill your SMS credits. Before you can send an SMS, you need to have enough SMS credits available or purchase additional SMS credits in the form of a one-time refill.
To review or refill your SMS credits, follow these steps.
From the SMS checklist, review the number of SMS credits needed to send or schedule your text message. If you have enough SMS credits available to complete your send, you don’t need to refill your SMS credits. If you want to finish your SMS at another time, click Finish later.
- Be sure to refill your SMS credits for each sending number to send SMS to multi-audiences and multi-countries. Also estimate your costing for each country before sending your SMS or email.
- If you need to purchase additional credits, click Buy credits. On the Manage Credits page, click the drop-down, then select the number of credits you’d like to purchase. This is a one-time credit refill purchase, and it won’t impact your recurring monthly credits.
If you need to purchase additional credits, click Buy credits. On the Manage Credits page, click the drop-down, then select the number of credits you’d like to purchase. This is a one-time credit refill purchase, and it won’t impact your recurring monthly credits.
- Click Next, then enter your payment, contact information, and billing information.
- When you’re ready to purchase your SMS credit refill, click Pay now. The number of SMS credits you selected will be automatically added to your SMS Marketing program.
Note
- Your SMS credit information only appears on the SMS checklist after you add content to your text message.
- SMS credit costs are calculated according to your SMS Marketing program’s sending country.
Send or schedule an SMS
Send your SMS immediately during an available time or schedule it for a future time. Text messages can only be sent between specific hours based on your SMS Marketing program’s sending country. The hours outside of these time frames are considered quiet hours for your subscribed SMS contacts.
To send or schedule an SMS, follow these steps.
From the SMS checklist, click Send or Schedule.
In the Send or Schedule pop-up modal, click Send now to send your SMS immediately outside of quiet hours. If you’ve set custom quiet hours, you can send your message within your designated time frame. If you try to send an SMS during quiet hours, we automatically queue it to send at the next available time.
In the Send or Schedule pop-up modal, click Send later to schedule your SMS, then select a future date and a time from the drop-downs. Select a time outside of your program's quiet hours. If you need to change your program's quiet hours, click Edit quiet hours.
When you’re ready, click Send or Schedule.
Excellent! You’ve sent or scheduled your SMS. During the sending process, we'll show you the percentage of contacts who’ve received the SMS. The amount of time it takes to complete an SMS send can vary. Your brand score, the number of recipients, and the amount of content in the message are factors that impact how long an SMS takes to send.
If you scheduled an SMS, the credits needed to complete the send are scheduled credits and will be deducted from the available balance of your current billing cycle. For example, if you create and schedule an SMS towards the end of one billing cycle and the SMS sends during the current billing cycle, the credits will be deducted from the current cycle, not when the SMS was scheduled.
Note
After you send an SMS, use Mailchimp Inbox to manage responses from your subscribed SMS contacts and send your own replies. To learn more, check out View and Manage Inbox Messages.
Review the send duration
If your SMS program is subject to rate limits, you'll see a Send duration section on the Send or Schedule modal. Each text message has a unique send duration that’s an estimate of the time it’ll take for all recipients to receive your message.
If your SMS hits rate limits, you’ll have options to customize the send duration and determine how long you want the message to send. There’ll be two options available; Send to all, or Customize the send duration.
Send to all will automatically send the maximum number of messages that your carrier allows on a daily basis. This'll go on for up to 30 days.
Use Customize the send duration when you want to have more control over how long the message sends for. Select the date and time that you want the SMS to finish sending by and instead of waiting for the SMS to finish in up to 30 days, you can choose when it’s complete.
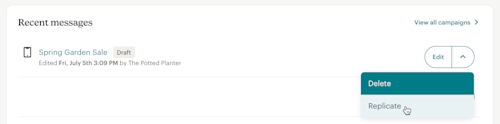
Manage your text messages
View and manage your sent, scheduled, paused, or draft text messages in the Recent messages section on the SMS overview page or on the All campaigns page.
From either page, replicate, pause, edit, or delete an SMS.
Replicate an SMS
To save time, replicate an existing SMS with similar content or recipients as the new SMS you want to send.
To replicate an SMS, follow these steps.
- Click SMS.
- In the Recent messages section, click the arrow drop-down next to the SMS you want to replicate, then click Replicate.
- In the Message Name section, click Edit. Enter the name of your replicated SMS, then click Save.
- Make any changes you need to the Recipients section or the Content section, then click Send or Schedule.
- Complete the Send or Schedule pop-up modal, then click Send or Schedule.
Pause and edit a scheduled SMS
To make changes to a scheduled SMS, first pause sending. Then, edit your content and resume sending. An SMS can remain paused as long as you need.
To pause and edit a scheduled SMS, follow these steps.
- Click SMS.
- In the Recent messages section, click Pause and edit next to the SMS you want to pause.

- While your SMS is paused, make any changes you need.
- When you’re ready, click Resume campaign.
- In the Send or Schedule pop-up modal, click your preferred option and schedule a new send date if needed.
- When you’re ready to send or reschedule your SMS, click Send or Schedule.
Nice! Your SMS will show as Scheduled again in the Recent messages section of the SMS overview page and on the All campaigns page.
Cancel an SMS
You can cancel an SMS at any time while it’s still sending. This'll cancel the remaining queued messages from sending.
To cancel an SMS, follow these steps.
- Click SMS.
- Scroll to the Recent messages section and find the SMS you want to cancel.
- Click the drop-down next to the View report button, then click Cancel sending.
- In the Are you sure you want to cancel? modal, click Cancel sending.
Delete an SMS
When you delete an SMS, it’s content and reporting data are permanently deleted.
To delete an SMS, follow these steps.
- Click SMS.
- In the Recent messages section, click the arrow drop-down next to the SMS you want to delete, then click Delete.

- In the Delete SMS campaign pop-up modal, click Delete.
Next steps
Now that you’ve created and sent a marketing SMS, consider these resources to optimize your experience.
About SMS Marketing with Mailchimp
Learn about rate limits, quiet hours, and more.Import SMS Marketing Contacts to Mailchimp
If you have contacts who have already opted in for your SMS marketing, import them to your Mailchimp audience with a CSV or TXT file.Create and Promote an SMS Marketing Signup Form
Use an SMS signup form to add new subscribed contacts to your audience who want to receive SMS marketing from you.View and Manage Inbox Messages
Use Mailchimp Inbox to view and manage 1-to-1 conversation threads with your subscribed SMS contacts.About SMS Reports
View a report for each SMS to see how your text message performed. Track your SMS marketing performance with engagement and Shopify e-commerce metrics.About Campaign Manager
Use Campaign Manager to schedule SMS touchpoints and streamline your marketing efforts.Use Send SMS Actions
Send marketing text messages automatically with a Marketing Automation Flow.All the Marketing Automation Flow Triggers
Learn more about the SMS triggers available with a marketing automation flow. Welcome new subscribed contacts with a text message, or send an SMS to contacts who text a specific keyword.
Technical Support

Have a question?
Paid users can log in to access email and chat support.