
Get the job done with a pro
From training to full-service marketing, our community of partners can help you make things happen.
Create an Automated Email Campaign from Your QuickBooks Online Dashboard
Once you’ve connected your QuickBooks Online and Mailchimp accounts, you can use the data from your QuickBooks Online account, like purchase history or buying habits, to automatically send marketing emails to customers who meet certain criteria.
In this article, you’ll learn how to create and start a Mailchimp automation flow, using a flow template map, to automatically send an email campaign to your QuickBooks Online customers.
Before you start
- You’ll need to have connected your QuickBooks Online and Mailchimp accounts to use the automation feature. Check out Connect or Disconnect Mailchimp for QuickBooks Online for more information.
- Depending on your plan, you may have limited access to Mailchimp’s Marketing Automation Flow. Check out About Mailchimp Pricing Plans for more details.
How it works
When you connect your QuickBooks Online and Mailchimp accounts, your QuickBooks Online customer information syncs to your Mailchimp account. Your customers transfer as contacts in your Mailchimp audience. The sync tags the contacts as having been imported from QuickBooks Online so that you can easily identify them for targeted marketing efforts.
You can use your QuickBooks Online dashboard to view your audience and contacts and create an automation flow that automatically sends emails targeted to your customers. You’ll select the customers you want to communicate with, specify what event will trigger the communication, design the campaign, and then start it.
For this example, we’ll use a flow template to send an email with a plant care guide to customers who have made a purchase. We’ll customize this so that it’s sent a day after the purchase.
Create an automated email campaign from your QuickBooks Online dashboard
To create the automated email campaign we’ve described, you’ll take the following actions:
- Choose the flow template.
- Add a send email action to the map and customize the content of the email.
- Add a time delay to the map.
- Remove any additional steps from the map.
- Activate the automated email campaign and monitor its progress.
Choose your flow template
To choose a flow template from your QuickBooks Online dashboard, follow these steps.
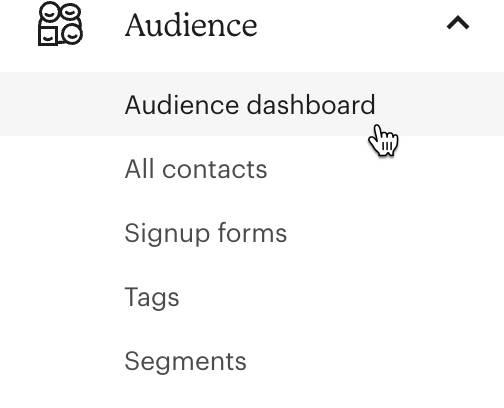
- Click Audience and then choose Audience dashboard.
- Scroll to Suggested Automations and click Start next to Create Repeat Customers.

- Click Build a Journey.

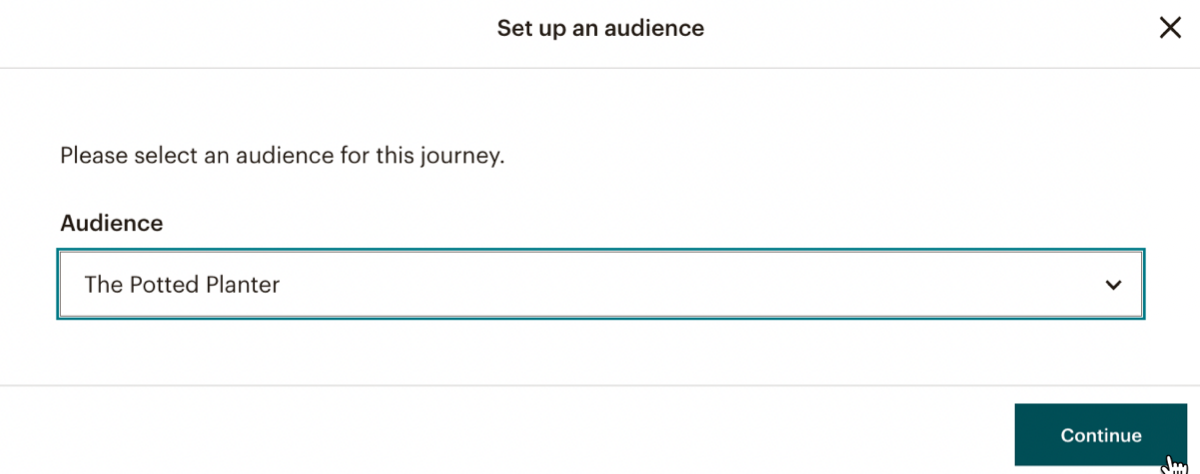
- Select the audience for the flow and click Continue.
The pre-filled map shows the conditions and actions in this workflow. In this example, a customer enters the workflow once they make a purchase.
Add a send email action
For this example, we want to add an action that sends an email to customers once they’ve purchased from you. To add this step to your map, follow these steps.
- Hover over the plus icon (+) and click Add a step. Then, choose Send email.

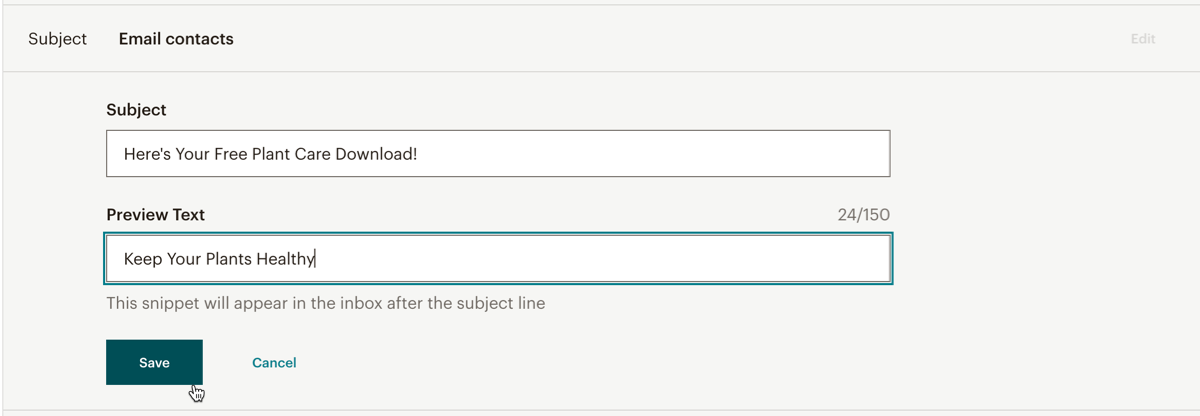
- Click Edit in the Subject section to customize the email subject and snippet text.
- Enter your preferred text and click Save.
- Click Select a template.
- On the Template step, choose your template. For more information, check out Types of Email Templates.
- On the Design step, design your email. For more information, check out Design an Email with the Legacy Builder.
- When your content is ready, click Save and Return to Journey to return to the automation flow map.

Add a time delay
Next, add a delay so that your customers receive this email the day after they make their purchase.
- On the map, hover over the plus icon (+) above the send email action you added and click Add a step.
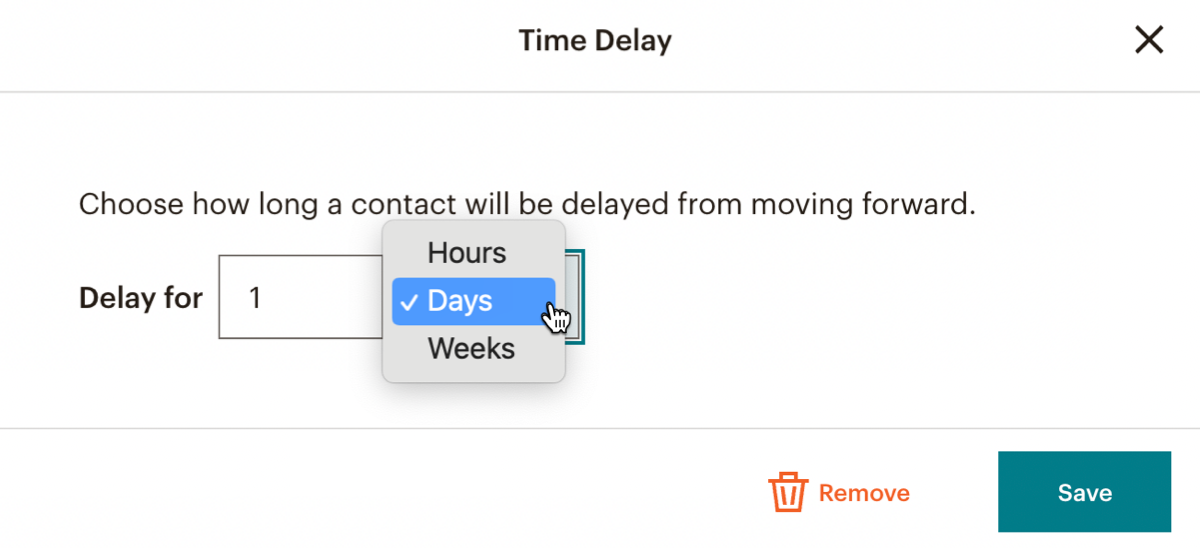
- Choose Time delay.
- Set your delay to 1 day and click Save.
Remove unneeded steps
The flow template offers additional steps, but for this workflow you won’t need anything more. To delete unneeded steps, follow these steps.
- Click the three vertical dots on a step you want to delete.
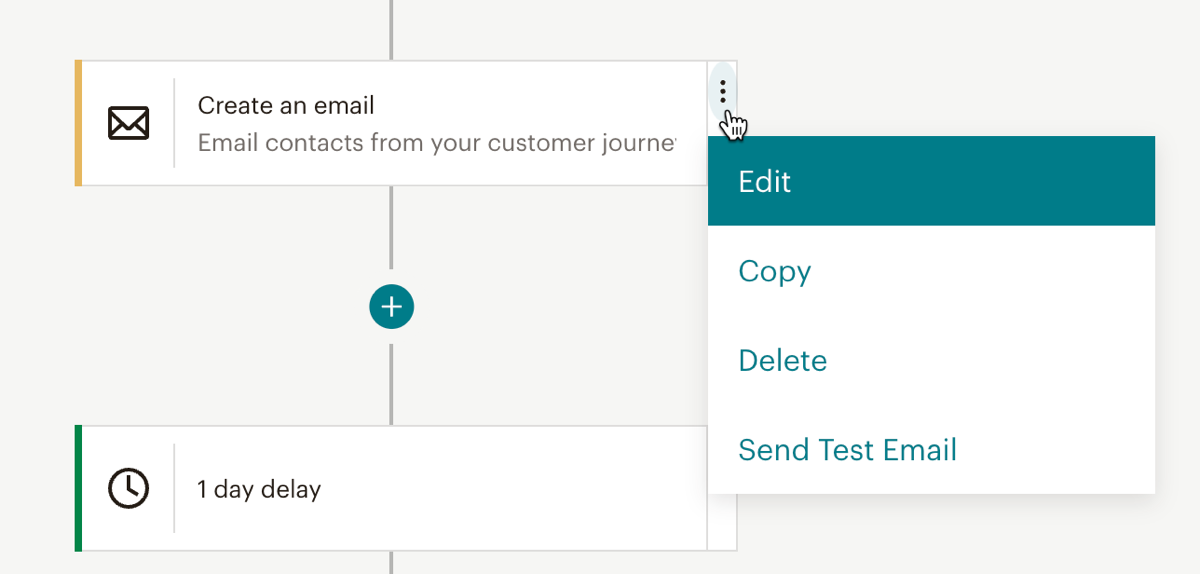
- Click Delete.
- Click Delete Action to confirm.
- Repeat for each of the additional steps.
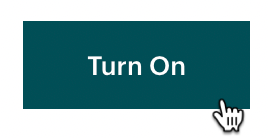
Activate the automation flow and monitor its progress
Review the automation flow map you’ve created. It should begin when a customer makes a purchase. After a delay of 1 day, the customer will receive the email you designed. If your map looks the way you want it, you can start the flow and see its progress.
- Click Turn On.
- To monitor the automated email campaign you’ve just started, return to your QuickBooks Online dashboard. Click Audience dashboard.
- Scroll to Suggested Automations. You’ll see the automation flow stats displayed.
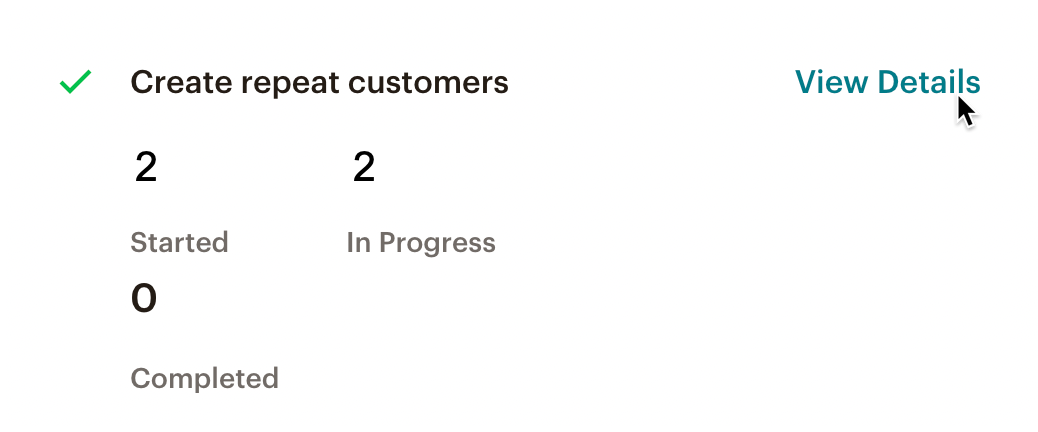
- You can also click View Details to see more information about the automation flow.
Next steps
Now that you’ve created your first automated email campaign, learn more about audience segments, automations, and email campaigns with the following articles and guides.
Technical Support

Have a question?
Paid users can log in to access email and chat support.