
Get the job done with a pro
From training to full-service marketing, our community of partners can help you make things happen.
Use Paragraph Content Blocks in the New Builder
Use Paragraph content blocks to add text and links to your email, then apply different font styles and settings as needed. After you add or click a Paragraph block, enter your text directly or edit the HTML code.
In this article, you’ll learn how to use Paragraph content blocks in the new email builder.
Before you start
Here are some things to know before you begin this process.
- These instructions apply to the new builder. For the legacy builder, check out Use Text Content Blocks in the Legacy Builder.
- Paragraph content blocks let you set different padding and margins between desktop and mobile versions of your email. Switch the Link Desktop and Mobile Styles toggle off in the editing panel to set separate values for those styles.
Note
For more information on each email builder and their content blocks, check out About Mailchimp's Email Builders.
Use Paragraph content blocks
To use a Paragraph content block, follow these steps.
- Click a Paragraph block, or click and drag a Paragraph block into your layout from the side panel.
- Add or edit your text.
- Use the editing toolbar to choose your font, and font size. In the toolbar, select the attributes and alignment. You can also insert a link or add merge tags.
- In the Text menu, click the Colors field to change the background color of your paragraph block.

- In the Padding section, enter a value or use the up and down arrows to adjust the padding for each side. Check the Apply to all sides box to apply the padding equally.
- In the Border section, use the drop-down arrow to choose your border style. Your options are None, Solid, Dashed, Dotted, Double, Inset, Outset, Groove, or Ridge. Enter a value or use the up and down arrows to set your border width in pixels. Click the color circle to change the color of your border.
- In the Margin section, enter a value or use the up and down arrows to set your margin width in pixels. The Apply to all sides box is checked by default.
- In the Rounded Corners section, enter a value or use the up and down arrows to change the size shape. The default value is 0, which means the corners are squared. Uncheck the Apply to all sides box and enter different values to create asymmetrical corners. Select a border or change the background color to see the rounded corners.
Rounded corners won't display in most Outlook desktop versions, but will display in browser versions of Outlook. - If you want to revert your content to your default styles for Paragraphs, click Restore default styles.
Wrap text around an image
There are 2 ways to add an image to your email.
- Use an image content block to add an image before, next to, or after other content.
- Use a paragraph content block to wrap text around an image.
To wrap text around an image in a paragraph content block, follow these steps.
- Click the paragraph content block you want to work with.
- Within your text, click where you want to place your image, then click the image icon in the editing toolbar.
- Select the image you want to use, then click Insert.
- Click and drag the image to move it within the content block.
Note: The Text menu opens when the paragraph content block is selected. Click the image within the paragraph content block to open the Edit Image menu.
Edit an image in a paragraph content block
To edit an image in a paragraph content block, follow these steps.
- Click Edit to adjust your image in the photo editor.
- Select your image size. We recommend that you use images with a minimum size of 660px. Double your file size to a minimum of 1320px if you want your images to look great on retina displays.
- Set the image Alignment as left, center, or right. Image and text alignment will change how your text wraps around your image.
- If you want the image to link to a page or profile on the web, add a URL to the Link to field. Leave the box checked to open the link in a new tab.
- In the Alt Text field, use the suggested descriptive text or change it to make your email more accessible.
- In the Border section, use the drop-down arrow to choose your border style. Enter a value or use the up and down arrows to set your border width in pixels. Click the color circle to change the color of your border.
- In the Rounded Corners section, enter a value or use the up and down arrows to change the size. The default value is 0, which means the corners are squared. Uncheck the Apply to all sides box and enter different values to create asymmetrical corners.
Rounded corners won't display in most Outlook desktop versions, but will display in browser versions of Outlook. - In the Padding section, enter a value or use the up and down arrows to adjust the padding for each side. Check the Apply to all sides box to apply the padding equally.
Use Write with AI
For customers on a Standard plan or higher, take advantage of Write with AI to have custom subject lines and email copy created for you. This feature uses Intuit AI, a generative AI tool that helps you create on-brand content with speed and efficiency based on prompts you provide. To learn more about this feature, check out Use Write with AI to Create Content.
View and edit HTML code
The Paragraph content block has a Code tab to view and edit the content block’s HTML code. This is an advanced feature and is recommended for users familiar with custom coding. Contact your developer, or hire a Mailchimp Expert if you need assistance.
To view and edit the HTML code in the Paragraph content block, follow these steps.
- Click a Paragraph block, or click and drag a Paragraph block into your layout from the side panel.
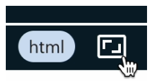
- In the Text menu, click the Code tab. Then edit, type, or paste in your code.

- Click the full screen icon to view the code editor across your entire browser window.
- When you’re finished, click Done.
You’ll automatically see your code rendered in the Paragraph block as you add and edit. As you code, consider some of our code tips and supported HTML elements. We recommend that you preview and test your email.
Enable dynamic content
You can turn any content block into dynamic content that displays different content to recipients based on conditions you set. This helps target different types of contacts at the same time with a single email.
To learn more about dynamic content and how to enable it in your content block, check out About Dynamic Content.
Technical Support

Have a question?
Paid users can log in to access email and chat support.