Sell More Stuff with Mailchimp
Use Mailchimp's free e-commerce tools to boost ROI and attract new customers. Learn how our powerful features can help you sell more stuff.

Get the job done with a pro
From training to full-service marketing, our community of partners can help you make things happen.
Mailchimp for Magento is a free integration that adds your customers and their order information to your Mailchimp audience. Use Magento purchase data to send targeted emails with product recommendations, and turn on e-commerce tracking to measure campaign ROI.
In this article, you'll learn how to connect or disconnect Mailchimp for Magento.
Note
Here are some things to know before you begin this process.
Here's a brief overview of the multi-step installation process.
Access and Download Mailchimp for Magento
Install Mailchimp for Magento
Configure and Connect
To get started, you'll download the Mailchimp for Magento file extension from ebizmart's marketplace.
To access the free Mailchimp for Magento file extension, follow these steps.


That's it! You will receive an order confirmation email that contains a download link. After the file downloads to your computer, you'll use it to install Mailchimp for Magento.
To install Mailchimp for Magento, you’ll upload the contents of the ZIP file to your Magento store root directory, and flush the Magento cache. If you need help with this, contact your developer or Magento expert.
Refer to this chart to see where the ZIP download files should go in your Magento root directory.
| Folder Name | Corresponding Directory Folder |
|---|---|
| MailchimpForMagento/app | Root directory/app |
| MailchimpForMagento/js | Root directory/js |
| MailchimpForMagento/lib | Root directory/lib |
| MailchimpForMagento/skin | Root directory/skin |
| MailchimpForMagento/shell | Root directory/shell |
After you update the root directory, flush the Magento cache.
To flush your Magento Cache, follow these steps.


Almost there! Next, you'll configure your Mailchimp for Magento settings, and complete this process.
To wrap up, you'll configure your Mailchimp for Magento settings, like how and where to sync your customers to Mailchimp. You can set a default configuration, or configure your settings on a store by store basis.
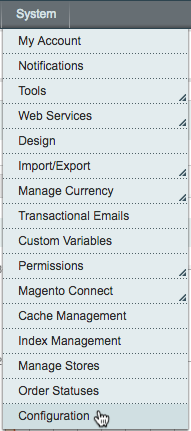
To configure and connect to Mailchimp, follow these steps.


Mailchimp and Magento are now connected. Magento customers will be added your audience, and e-commerce data will be added to Mailchimp's subscriber profiles. Guest checkouts will be added to your audience as non-subscribed contacts.
Products, customers, and orders will be sent to Mailchimp approximately every five minutes via a cron job.
Note
Magento supports multiple websites or store views. If your store has multiple domains, you can connect each to their own Mailchimp audience. Contact your Magento developer or hire an expert for assistance.
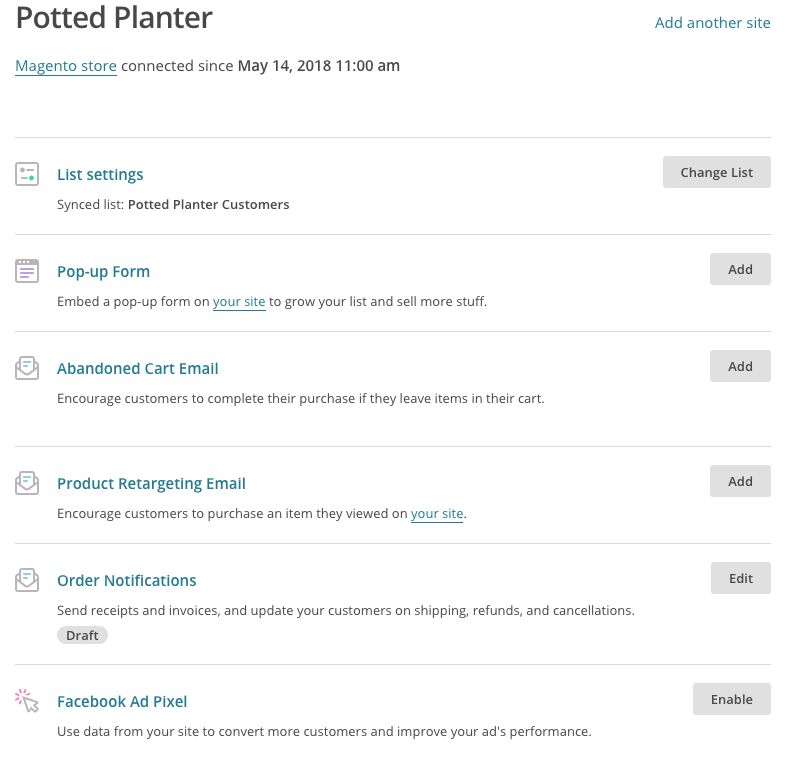
After you install Mailchimp for Magento, you can visit the Integrations page in your account and view details for your connected store. Here, you can see the status of the integration or add and manage e-commerce features.
To view your site details, follow these steps.
From here, you'll be able to view your synced audience, embed a pop-up signup form on your site, or add and monitor e-commerce automations that use data from your connected Magento store.

To change the Mailchimp audience synced with Magento, you'll need to return to your Magento Admin Panel. It's important to note that If you change your synced audience, the integration will recreate your store in your Mailchimp account and you'll need to recreate any active automations connected to your store.
To change your synced audience, follow these steps.


If you want to send transactional emails with Mailchimp Transactional (formerly Mandrill), you can connect Mailchimp for Magento to your Mailchimp Transactional account.
To connect to Mailchimp Transactional, follow these steps.


Nice job! You should see a success message, as well as Account Info statistics about your username, reputation, hourly quota, and backlog.
After you connect, you can do a lot with the data you collect, like build segments, send automations, track purchases, make product recommendations, and view results.
Find out everything Mailchimp has to offer in these guides.
Sell More Stuff with Mailchimp
About Personalized Product Recommendations
Create a Classic Abandoned Cart Email
Segment by Purchase Activity
For help with the Mailchimp for Magento data sync, visit ebizmarts' Mailchimp for Magento support forum.
If you need assistance with Mailchimp, visit our guides and tutorials or contact Support.
If you need to disconnect the integration, you can disable it in Magento at any time.
To disable the integration, follow these steps.


To learn how to remove the integration entirely, visit ebizmarts' Mailchimp for Magento support forum.
Technical Support

Have a question?
Paid users can log in to access email and chat support.
Use Mailchimp's free e-commerce tools to boost ROI and attract new customers. Learn how our powerful features can help you sell more stuff.
Send an email to customers who add items to their cart but don't check out. Recover lost sales for your e-commerce store.
Learn how to set up Mailchimp for Adobe Commerce, formerly Magento 2. Add customer data from your Adobe Commerce store to a Mailchimp audience, automate abandoned cart emails, and more.